 |
|
 02-06-2010, 03:33 PM
|
#31
|
|
TrailManor Master
Join Date: Jan 2022
Location: San Diego, California
Posts: 2,835
|
After all this squack.....my friend just gave me a charge controller. Guess I'll go ahead and wire it in ") . It may even make my wiring job neater and more permanent.

__________________
TrailManor Elkmont
640W solar- 230AH LiFeP04 Battery
|

|

|
|
02-15-2010, 06:34 PM
|
#32
|
|
TrailManor Master
Join Date: Jan 2022
Location: San Diego, California
Posts: 2,835
|

OK.....Finished except a little tidying up of some wires.....The Volt meter is just on there with Velcro and the wires are temporary, as I use yje meter for other things. I may just mount it there perminently and hide the wires. The meter is only $5 at HarborFreight.
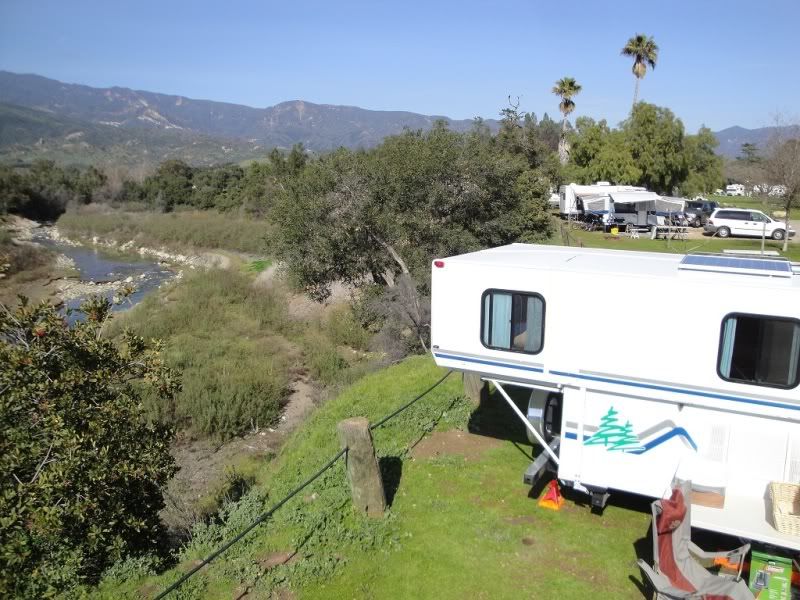
We camped at Lake Casitas for 4 nights & 4 days.
It was a lot colder than we suspected (low 30's at night). The 1st night, we accidentally left the ceiling vent fan open and running all night with the furnace going at the same time.....duh!!!!! I was aware that the furnace ran all night but I was just too tired to get up and find out why. At 6:AM, I found the ceiling fan running.
Anyway, I checked the voltage of the batteries just before the Sun hit the panels. 12.5V:

About 30 minutes after the Sun hit the panels (@ about 5 degrees off the horizon):

This was about 2:PM the following day, 14.65V (@ about 80 degrees above the horizon):

When we left, after 4 days of dry camping the batteries were at full charge.
We used the lights at will, ran the furnace all night and used the microwave twice (5 minutes each time) to heat lunch. We didn't even put fuel in the generator.
I have under $600 in the entire project (incl $50 for the regulator that I didn't buy).
It adds a few minutes to set-up and tear down but it is well worth not having to deal with (or listen to) the generator.
__________________
TrailManor Elkmont
640W solar- 230AH LiFeP04 Battery
|
|
|
|
|
02-15-2010, 07:37 PM
|
#33
|
|
TrailManor Master
Join Date: Jan 2022
Location: San Diego, California
Posts: 2,835
|
You can't see the panels at all, from the ground. This was taken as I stood on top of my camper shell:
__________________
TrailManor Elkmont
640W solar- 230AH LiFeP04 Battery
|
|
|
|
|
02-25-2010, 10:10 PM
|
#34
|
|
Senior Member
Join Date: Apr 2009
Location: Texas
Posts: 153
|
Nice Job!
Nicely done! I'm impressed with your mounted panels.
Now how many hours went into your project?
__________________
2008 TM3023
TV#1: 2008 Chrysler Town & Country (3.8L Touring w/ tow package, WDH) (*retired 2018*)
TV#2: 2015 Nissan Pathfinder (w/ tow package, WDH)
TV#3: 2018 Ford F150 (w/ tow package, WDH)
|

|
|
|
02-25-2010, 11:18 PM
|
#35
|
|
TrailManor Master
Join Date: Jan 2022
Location: San Diego, California
Posts: 2,835
|
Quote:
Originally Posted by TexasCamper

Nicely done! I'm impressed with your mounted panels.
Now how many hours went into your project?
|
A lot more than it should have. Just think of all the time that it will save the next guy..... 
Procurement takes a lot of time. eBay is a big help with that.
Experimenting with different brackets and finding out that the panels had to go a good distance back on the roof took a lot of time. Fiddling with the wiring probably took longer than it should have.
I think that if someone reads this thread and learns from my experiments/mistakes , it could be a one day project (after procuring all the stuff).
Speaking of which.......using these terminals on the 10G wire will save a lot of time:
 http://cgi.ebay.com/ws/eBayISAPI.dll...=STRK:MEWNX:IT
These are the connectors that come on most solar panels. If you use them on your wiring, you can disconnect the panels separately and save yourself a lot of grief. The wire that runs from the controller to the roof needs to end on the roof and a "Y" need to be soldered together to connect the panels after mounting them.
I also wish that I would have used 10/2 flat marine grade wire:
http://cgi.ebay.com/ebaymotors/10-2-...ssoriesQ5fGear

You'll need 25'.
The round wire is a little bulky. It's OK, the flat would just be better.
My mounting brackets were cut from a 36" piece of 4" entry door sill plate ($14). It's hardened aluminum, it's easy to cut & drill and very strong. The female brackets on the roof are just 1" wide flat aluminum stock ($4) that I bent in a vise. I attached everything with 3/16" pop rivets and sealed the brackets to the roof with silicone sealer.
__________________
TrailManor Elkmont
640W solar- 230AH LiFeP04 Battery
|
|
|
|
|
02-26-2010, 09:45 AM
|
#36
|
|
Site Team
Join Date: Feb 2003
Location: The mountains of Scottsdale, AZ, and the beaches of Maine
Posts: 10,104
|
That's a really nice job, Wayne. In fact, I'm thinking about redoing mine the same way. One thing needs to be pointed out, though, and that is that the chosen location is just aft of the air conditioner on most models. (The airco is on the rear edge of the front shell). That means that the airco will cast a shadow on part of the roof, which means it is important to park the TM so the nose points more or less north, so the shadow does not fall on the panels. This is usually easy to accomplish when you are dry camping, which is when the panels get used, of course. But it is important, since even a small shadow cuts the panel output far more than in proportion to shadow area.
Bill
|
|
|
|
|
02-26-2010, 10:45 AM
|
#37
|
|
TrailManor Master
Join Date: Jan 2022
Location: San Diego, California
Posts: 2,835
|
Quote:
Originally Posted by Bill
That's a really nice job, Wayne. In fact, I'm thinking about redoing mine the same way. One thing needs to be pointed out, though, and that is that the chosen location is just aft of the air conditioner on most models. (The airco is on the rear edge of the front shell). That means that the airco will cast a shadow on part of the roof, which means it is important to park the TM so the nose points more or less north, so the shadow does not fall on the panels. This is usually easy to accomplish when you are dry camping, which is when the panels get used, of course. But it is important, since even a small shadow cuts the panel output far more than in proportion to shadow area.
Bill
|
Another option would be to mount the panels farther aft.
In my installation, I used rigid extenders for the forward bracket that hooks around the front of the shell. I plan on changing that and using 6" wide nylon webbing. The webbing could be any length but it is expensive stuff. I just happened to have some laying around.
That forward bracket (hooked over the front edge of the shell) is only meant to "lock" the panels in place so that they won't blow off or be easily removed by someone. I can't imagine someone climbing up on the roof, while the trailer is set up, to try to steal the panels.
The issue that I have with the rigid extender is that the panels hang off of the edge of the bed about 12" (see post #23, 3rd pic). This may be enough to encourage some bouncing while towing. If I use nylon webbing, the panels will lay totally on the bed as the webbing can be folded. However, I would have to find something rigid (like a broom) to push the panels past the retaining brackets on the roof.
If the panels were mounted farther aft, that would allow you to carry them back to the rear bumper and put them in place without having to slide them in place also.
__________________
TrailManor Elkmont
640W solar- 230AH LiFeP04 Battery
|
|
|
|
|
10-22-2010, 12:09 PM
|
#38
|
|
Guest
|
Hi Carolyn & Wayne,
Can you post a picture of your battery set-up and hook-up? I am quite interested in seeing how you did it.
Thanks,
Karen
|
|
|
|
|
10-22-2010, 04:39 PM
|
#39
|
|
TrailManor Master
Join Date: Jan 2022
Location: San Diego, California
Posts: 2,835
|
Quote:
Originally Posted by namklg
Hi Carolyn & Wayne,
Can you post a picture of your battery set-up and hook-up? I am quite interested in seeing how you did it.
Thanks,
Karen
|
If you are talking about the batteries, specifically, these pics may help. You must keep in mind that the use of the heavy gauge battery cable (and the 175A fuse on the positive post) is due to the 2500W inverter that I have. If you have no inverter, I would still suggest #2 or #4 battery cable between the 2 batteries. However, 8G or 10G wire should be sufficient for the positive wire from one battery and the negative wire from the other.
If you are referring to the solar hook-up, I have different pics.
__________________
TrailManor Elkmont
640W solar- 230AH LiFeP04 Battery
|
|
|
|
|
10-22-2010, 08:02 PM
|
#40
|
|
Guest
|
Quote:
Originally Posted by harveyrv
If you are talking about the batteries, specifically, these pics may help. You must keep in mind that the use of the heavy gauge battery cable (and the 175A fuse on the positive post) is due to the 2500W inverter that I have. If you have no inverter, I would still suggest #2 or #4 battery cable between the 2 batteries. However, 8G or 10G wire should be sufficient for the positive wire from one battery and the negative wire from the other.
If you are referring to the solar hook-up, I have different pics.
|
Thank you for the battery pictures.... I am just learning.. I believe the the inverter is within the system that the dealer installed. So, I just need to understand how to hook the batteries together. Right now there are fuses off of both positive and negative on the battery.
I think I will order the correct battery cable for the system. I think several folks have ordered from 1 or 2 places in Arizona.
karen
|
|
|
|
|
|
|
Currently Active Users Viewing This Thread: 1 (0 members and 1 guests)
|
|
|
 Posting Rules
|
You may not post new threads
You may not post replies
You may not post attachments
You may not edit your posts
HTML code is Off
|
|
|
|
 » Recent Threads
 |
|
|
|
|
|
|
|
|
|
|
|
|
|
|
|
|
|
|
|
|
|
|
|
|
|


 Linear Mode
