My parts were a day late coming so I didn't get to installing the glass panel until today.
The glass panel is mounted on 4 z-brackets supplied by Renogy (as suggested by rickst29). The 3M tape was affixed to the brackets and anchored to the roof. I carefully cleaned roof with the Awesome Orange cleaner and 50/50 alcohol solution where the brackets would come to rest. Here's a shot of all three mounted:
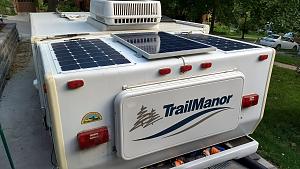
These three panels add just over 25 lbs to the weight of the rear shell so there shouldn't be too much difference in lifting it.
As mentioned in my earlier post, I used the CordMate III channels to hold all of the panel and camera wiring. Here's a shot of the wire channels holding all of the wires.
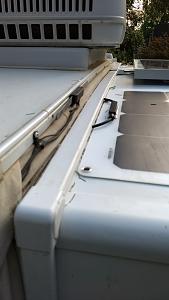
I must say, it's very difficult to close the channel cover wherever the MC-4 connectors are located. I hope they'll stay closed. I also plan to apply some caulk/adhesive where the channel meets the roof to make sure it stays there.
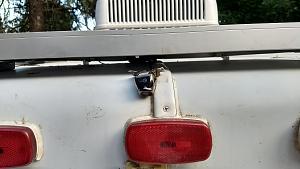
I need to pick up some screws to mount the backup camera tomorrow. This little camera was previously used on my TV but it was mounted in a location that was often bumped. I used a different camera that better resembled an OEM installation so I had this one as an extra. I've run the video cable up to the area of the electric jack where I'll be mounting a wireless transmitter in a PVC (waterproof) electrical box (which will be pipe-clamped to the jack tube). The transmitter's power will be manually switched on and the TV camera (which uses another identical wireless transmitter) will be switched off. In that way, I can choose which backup camera to view (TV or trailer) on the screen between the driver and passenger seats. Here's the trailer backup camera as it exists now -- it will be attached to the glass panel frame:
Next, I'll be routing all of the wiring to the street-side lift arm and getting them to the rear "electrical room".