I would like to share information on my solar install. I'm getting it all ready for boondocking on the north shore of Lake Superior the last week of July.
I can't really take much credit for the design -- much of it came from this forum and one member in particular, rickst29.
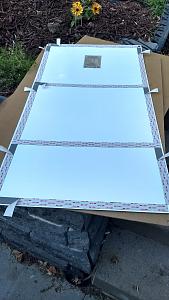
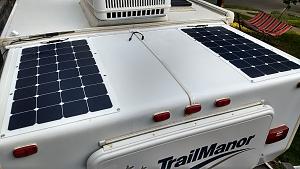
I'm installing an array of 3x100W panels -- 2 of them are flexible (mainly to keep the weight down) and 1 rigid panel straddles the center seam of the rear shell. The performance characteristics of the rigid matches those of the flexible panels pretty closely so it works out well. The panels are wired in series to produce a maximum voltage of about 50V and maximum current of around 5.5A The panels feed into a EP Solar Tracer 2215BN that will charge the two GC2 batteries (225 AH).
I opted for 3 panels to offset the energy loss since the panels are mounted flat on the shell and not able to tilt for maximum insolation.
At this point, I have the two flexible panels attached -- I'm waiting on some video/power cable to arrive tomorrow so that I can attach a video camera to the aluminum frame of the rigid panel before I install that one.
I first installed some Cordmate III plastic wiring channel just behind the bag seal and down the street-side window. Nothing new here; there are plenty of posts showing how others have installed this to hold/hide the wiring.
Following rickst29's suggestions, I used 3M RP32 adhesive tape to attach the flex panels. I pulled the protective covering of the tape at the ends of the segments so that I could easily pull it off as I was laying the panel down:
After I cleaned the shell surface with Awesome Orange cleaner and 50% alcohol solution, I put the top of the panel against the wiring channel and carefully pulled the protective covering off of the top strip and pressed it down. I was able to hold the flexible panel up with my bald head and one hand while I progressively removed the protective covering off of the next set of tape segments. This made attaching the panels by myself relatively easy.
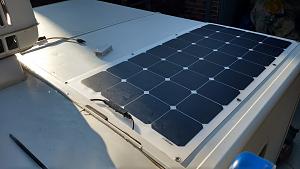
I then used a rat-tail file on the wiring channel to provide a place for the panel wires to enter the channel. I repeated all of this on the other side of the shell and here's the result:
Boy, after cleaning the portion of the rear shell, the rest looks especially dirty. I guess I'll be doing the same on the rest of the trailer!
Tomorrow I plan on attaching the rigid panel provided some additional materials arrive in the mail. I'll continue the thread then.